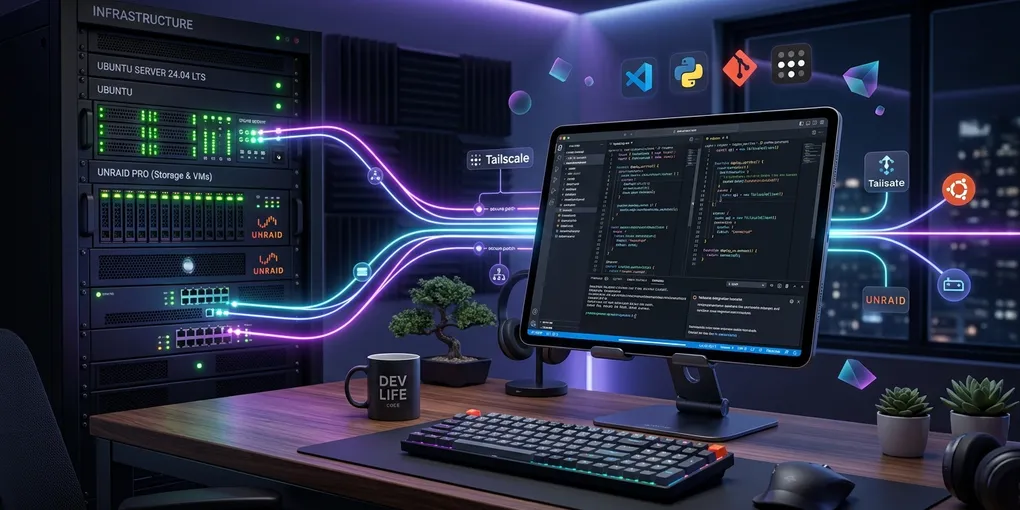
For years, the promise of “iPad-only software development” has hovered just out of reach. We’ve tried local terminal emulators, sandboxed IDEs, and various cloud platforms, but they always felt compromised—hampered by iPadOS file system limitations, lack of Docker support, or high monthly costs.
By shifting the heavy lifting off the iPad and onto a self-hosted Unraid server, we can build a setup that offers:
- Desktop-Class Performance: Run heavy compilations, database containers, and build steps locally on home hardware.
- Infinite Battery & Silent Operation: The iPad acts as a thin client, leaving battery consumption minimal and the device completely cool.
- Always-On Connections: Tailscale keeps your workspace securely connected over cellular or coffee shop Wi-Fi without exposing ports to the public internet.
- Unbreakable Sessions: With Tmux and Termius Free, your terminal windows and active tasks survive network drops, device switches, and app backgrounding seamlessly.
- Agentic Workflows: With Antigravity CLI installed on the VM, you have a powerful AI partner to help you build, test, and write code right from the terminal.
Here is the exact blueprint for setting up this remote productivity environment.
Step 1: Spin Up the Ubuntu VM in Unraid
The foundation of our remote workspace is a virtual machine running on Unraid. Ubuntu Server is the ideal choice—it’s lightweight, has great package compatibility, and doesn’t waste CPU or RAM cycles on a GUI we won’t use.
VM Configuration:
- Navigate to the VMs tab in Unraid and click Add VM -> Ubuntu.
- CPU & Memory Allocation: Assign at least 4-8 logical CPU cores and 8GB-16GB of RAM (depending on your project sizes).
- Primary vDisk Size: Allocate at least 60GB-100GB to give your build caches, Docker images, and repositories room to grow. Set the controller to VirtIO for optimal performance.
- Network Bridge: Ensure the network bridge is set to your primary network (usually
br0), allowing the VM to get its own IP address from your local router. - OS Install: Mount the latest Ubuntu Server ISO, start the VM, open the VNC console, and follow the standard installation prompts. Be sure to select Install OpenSSH Server during setup.
Step 2: Tailscale—Seamless & Secure Networking
To access our development VM from anywhere in the world without exposing SSH or Web ports to the public internet, we use Tailscale. Tailscale creates a secure, encrypted peer-to-peer mesh network (a “tailnet”) between all registered devices.
Installing Tailscale on the Ubuntu VM:
SSH into your newly created Ubuntu VM and run the simple Tailscale installation script:
curl -fsSL https://tailscale.com/install.sh | shOnce installed, start the authentication process:
sudo tailscale upTailscale will display a login URL. Open it in a browser, authenticate with your account, and your VM will join your tailnet.
Installing Tailscale on the iPad:
- Download Tailscale from the App Store.
- Log into the same account.
- Turn on the VPN configuration when prompted.
Now, your iPad and Ubuntu VM can securely communicate using their private Tailscale IP addresses (or MagicDNS hostnames), regardless of what network either device is connected to.
Step 3: Power CLI Toolset & Terminal Suite (ZSH, Oh My ZSH, & Tmux)
A remote terminal workspace is only as good as its shell and session management. By installing ZSH, Oh My ZSH, and Tmux, combined with modern CLI utilities, our command-line environment on the Ubuntu server becomes insanely fast and resilient.
1. Modern Shell: ZSH & Oh My ZSH
Replace the default Bash shell with ZSH and Oh My ZSH for intelligent autocompletion, git integration, and custom themes:
# Install ZSH and CLI utilities
sudo apt update && sudo apt install -y zsh tmux ripgrep fzf btop jq direnv git-delta gh ncdu fd-find

# Set ZSH as your default shell
chsh -s $(which zsh)

# Install Oh My ZSH
sh -c "$(curl -fsSL https://raw.githubusercontent.com/ohmyzsh/ohmyzsh/master/tools/install.sh)"
2. Persistent Terminal Sessions: Tmux
When working from an iPad, network connections will occasionally drop when switching Wi-Fi access points or putting the iPad to sleep. Tmux ensures your terminal sessions, active builds, and subagent tasks never die.
Create or update your ~/.tmux.conf on the VM with this sleek, developer-friendly configuration:
# --- General Settings ---
# Start window and pane numbering at 1 (easier to reach on keyboard)
set -g base-index 1
setw -g pane-base-index 1

# Automatically renumber windows when one is closed
set -g renumber-windows on

# Increase history limit
set -g history-limit 50000

# Enable mouse support (scrolling, clicking, resizing panes on iPad touch/trackpad)
set -g mouse on

# Decrease command delay for responsive feel
set -s escape-time 0

# --- Key Bindings ---
# Split panes using | and - (opens in the current working directory)
bind | split-window -h -c "#{pane_current_path}"
bind - split-window -v -c "#{pane_current_path}"
unbind '"'
unbind %

# Reload config file with 'r'
bind r source-file ~/.tmux.conf \; display-message "tmux config reloaded!"

# Switch panes using Alt + Arrow keys without prefix
bind -n M-Left select-pane -L
bind -n M-Right select-pane -R
bind -n M-Up select-pane -U
bind -n M-Down select-pane -D

# --- Visual Settings (Sleek Dark Theme) ---
set -g status-justify left
set -g status-bg black
set -g status-fg white
set -g status-interval 5

# Left status (Session name)
set -g status-left-length 30
set -g status-left '#[fg=green,bold] #S #[fg=gray]| '

# Right status (Time and Date)
set -g status-right '#[fg=cyan]%Y-%m-%d #[fg=white]%H:%M '

# Active/Inactive window styles
setw -g window-status-current-style 'fg=black bg=green bold'
setw -g window-status-current-format ' #I:#W '
setw -g window-status-style 'fg=gray bg=black'
setw -g window-status-format ' #I:#W '

# Pane borders
set -g pane-border-style 'fg=brightblack'
set -g pane-active-border-style 'fg=green'
3. Essential Developer CLI Packages
The Ubuntu VM includes a curated suite of modern, high-performance CLI tools that replace legacy Unix utilities:
ripgrep(rg): Blazing-fast recursive codebase search.fzf: Interactive command-line fuzzy finder for files, history, and processes.btop: Beautiful, interactive process monitor and system resource analyzer.jq: Command-line JSON processor for API debugging and log parsing.direnv: Directory-specific environment variable manager.git-delta: Syntax-highlighting pager forgit diff.gh: Official GitHub CLI for pull requests, issues, and releases directly from the shell.ncdu: Disk usage analyzer with an interactive Ncurses interface.
Step 4: VS Code / Cursor Tunnels—Browser-Based Desktop IDE
Using an iPad with a touch screen or keyboard case means you need an editor that fits the form factor. VS Code Tunnels allow you to run VS Code on the VM and securely access it through a web interface (vscode.dev) on Safari or a dedicated browser wrapper.
Setting up the VS Code Tunnel:
On the Ubuntu VM, install the official VS Code CLI:
# Download and install the VS Code CLI
curl -Lk 'https://code.visualstudio.com/sha/download?build=stable&os=cli-alpine-x64' --output vscode_cli.tar.gz
tar -xf vscode_cli.tar.gz
sudo mv code /usr/local/bin/
Now, initialize the secure tunnel:
code tunnelYou will be prompted to authenticate with either a GitHub or Microsoft account. Once authenticated, the CLI will output a persistent URL (e.g., https://vscode.dev/tunnel/my-dev-vm).
Accessing it from the iPad:
Open Safari, Chrome, or a dedicated PWA-capable browser and go to your custom vscode.dev link. You will have access to a full, desktop-grade VS Code environment complete with:
- Full extension support (GitLens, Prettier, language servers).
- Integrated terminal access directly in your browser.
- Complete file explorer, multi-window split screens, and keyboard shortcuts.
Step 5: Add the Antigravity CLI (agy)
To take the setup to the next level, we install the Antigravity CLI (agy). Antigravity is an agentic coding assistant that runs directly in your terminal, capable of editing files, executing search queries, running tests, and managing background tasks autonomously.
Installing Antigravity:
Follow the setup instructions on your Ubuntu VM to install the antigravity-cli tool:
npm install -g antigravity-cliOnce installed, authenticate the CLI with your development credentials and run a diagnostic check:
agy doctorHaving agy on your remote VM means you don’t have to write code line-by-line using a touch interface or small keyboard. You can simply prompt the assistant:
“Hey Antigravity, add a new contact form to the landing page and style it to match our design system.”
The CLI will read your files, execute local commands, verify linting/testing, and commit the changes—allowing you to steer complex refactors from a tablet while riding the train or lounging on the couch.
Step 6: Optimizing the iPad Workspace
To make this feel like a native desktop workspace, you can optimize your client-side setup on the iPad by leveraging these options:
1. Terminal App: Termius (Free Version)
Termius is a premier SSH client for iOS/iPadOS, and its Free tier provides everything needed for a rock-solid remote workflow:
- SSH Key Management: Securely generate, store, and import ED25519 or RSA SSH keys to seamlessly authenticate with your Unraid Ubuntu VM without re-entering passwords.
- Tmux Integration & Persistence: Combine Termius Free with your server’s Tmux configuration. When you launch Termius, connect to your server, and attach to your active Tmux session (
tmux a), your multi-pane terminal layout, shell history, and running processes instantly restore—even if Termius was closed or iPad OS reclaimed memory in the background. - Custom Terminal Rendering: Supports full 256-color and TrueColor themes, customized fonts, and touch-friendly soft key helpers (for
Ctrl,Esc, arrow keys, and function keys). - Basic SFTP: Navigate the VM’s file system visually to download or upload files when needed.
2. Workspace Browser: Google Chrome
If you use Google Chrome on your iPad, you can access your remote VS Code Tunnel and optimize your workspace:
- Add to Home Screen: Navigate to your
vscode.devtunnel URL in Chrome. Tap the Share icon in the address bar (or the Chrome menu) and choose Add to Home Screen. This allows you to launch VS Code as a standalone Web App, removing browser tabs and search bars to maximize your screen space. - Keyboard Shortcuts: Chrome on iPadOS supports standard keyboard shortcuts (like
Cmd + Ffor searching, or arrow navigation) when combined with an iPad keyboard accessory.
The Verdict
By decoupling the editor UI from the compiler backend, the iPad becomes the perfect developer interface. It is light, boasts exceptional screen quality, stays completely silent, and runs for 10+ hours on a single charge.
With Unraid hosting the power, Tailscale handling the network mesh, Termius Free, Tmux, ZSH, and Oh My ZSH managing an unbreakable terminal suite, VS Code Tunnels serving the IDE interface, and Antigravity CLI supercharging execution, remote iPad development isn’t just possible—it’s a superior workflow.